Unity Meta File Deep Dive
In this article we’ll take a detailed look at what happens under the hood when you change Assets in a project using the Unity Editor.
We’ll cover additions, modifications, moves and deletes, showing you what each type of change looks like from a version control perspective and what you need to do in order commit the change without breaking your project.
Heads up Following along step-by-step on your own machine certainly isn’t required to get value out of this guide.
But if you want to follow along to build some “hands-on” knowledge, you’ll need a empty Unity project under git version control. Head over to our how to guide to get one set up.
Adding our first Asset
Starting with an empty Unity project under git version control, open the project in the Unity Editor.
Let’s start by importing a texture into our project to create a new Asset.
To do this, got to the application menu and choose Edit → Project Settings → Editor as shown below.
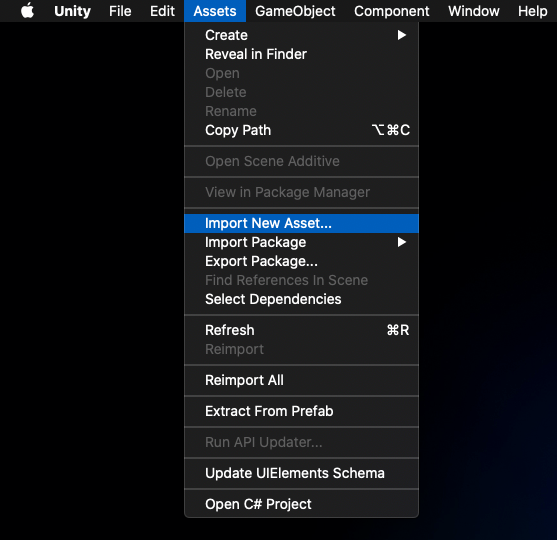
Any small image will do for our purposes. I’m going to import a PNG image file smiley.png
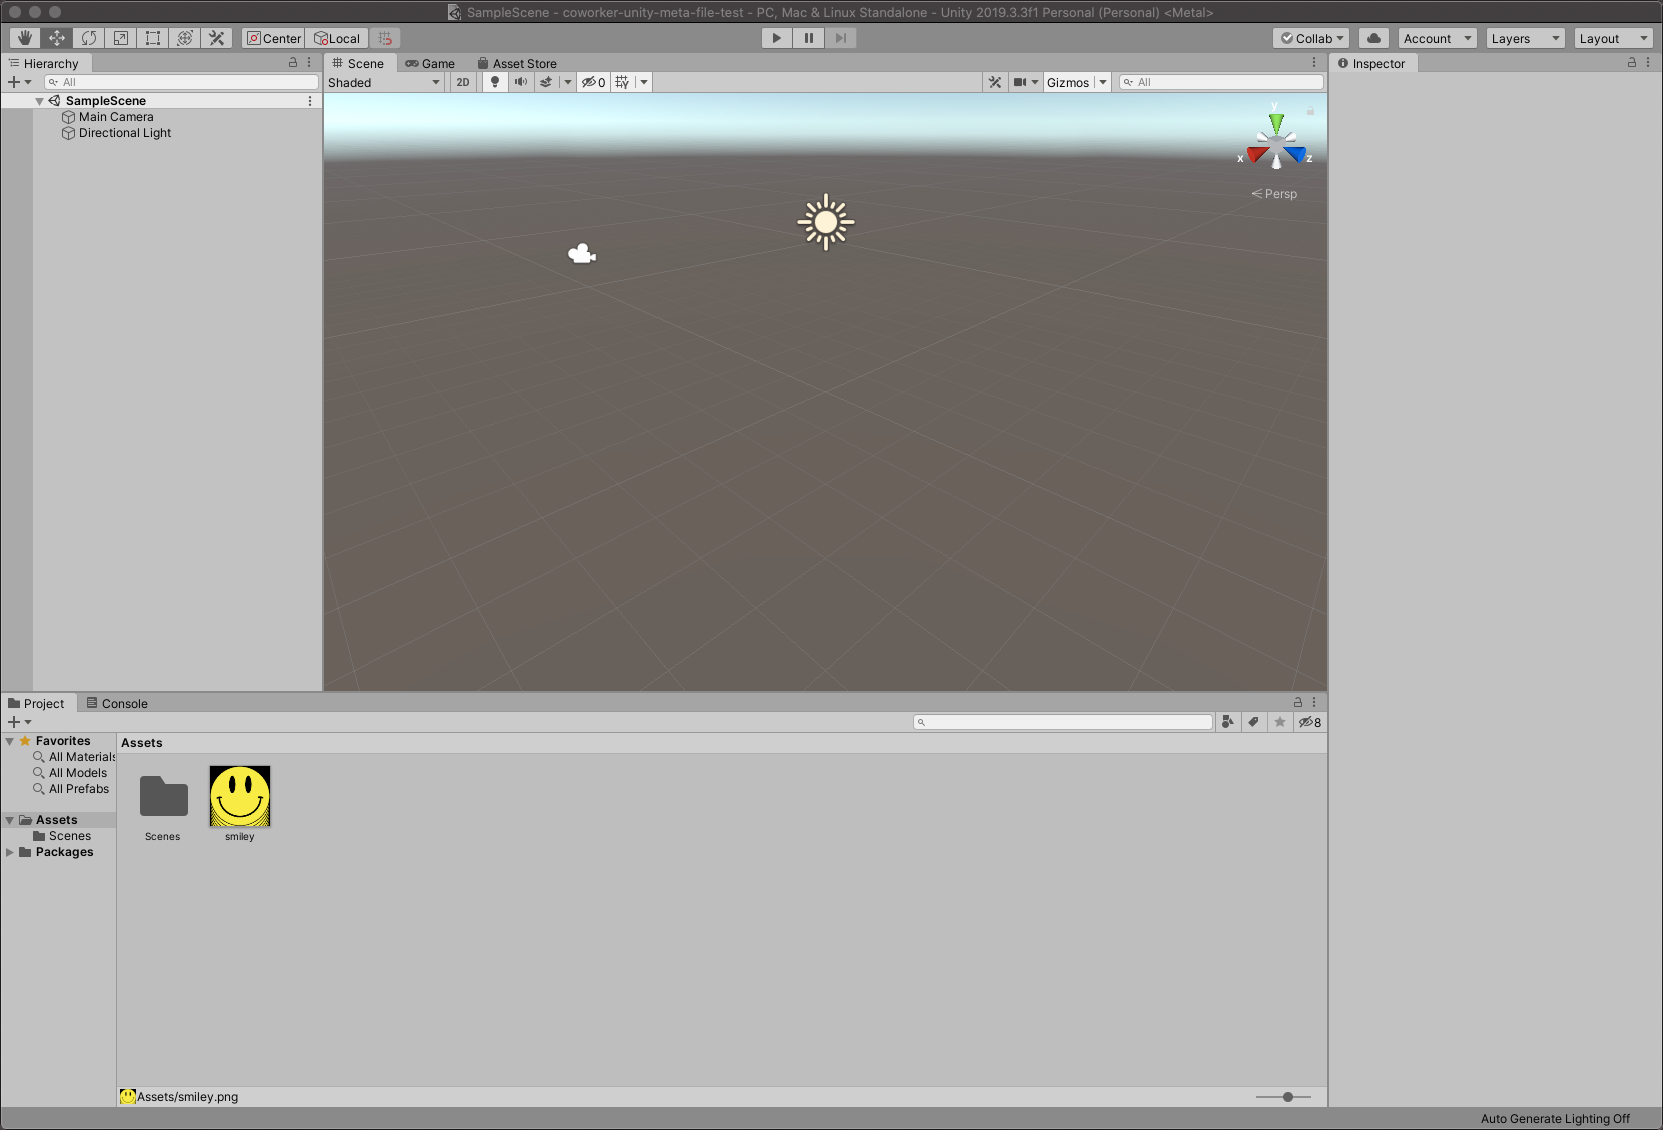
Once we have imported our Asset, we can see it by browsing to the Assets/ folder in the Project tab at the bottom of the Unity window.
What did this change mean for version control?
Let’s take look to see how this import changed our project files by running git status
➜  coworker-unity-meta-file-test git:(master) ✗ git status
On branch master
Your branch is up to date with 'origin/master'.

Untracked files:
  (use "git add <file>..." to include in what will be committed)
	Assets/smiley.png
	Assets/smiley.png.meta

nothing added to commit but untracked files present (use "git add" to track)
We see that Unity has taken a copy of our image and placed in the Project’s Assets/ folder, which sort of makes sense since we set out to add the image to the project by importing it.
But what’s this file alongside the image?
It has the same filename, but with an additional .meta (dot meta) extension.
Key point! That’s the first thing to learn about meta files. The Unity Editor creates and maintains a meta file for every Asset in your project.
They are named the same as Asset files but with an additional .meta extension. The meta file for smiley.png is smiley.png.meta
What are meta files for?
Meta files are one of the most common causes of mis-understanding and friction in Unity development, particularly on projects where a team is sharing the project through a version control system like git or Perforce.
If you are looking for your team to have a slick workflow so that they can develop effectively, it’s worth spending a bit of time to understand what meta files are and what they do.
Let’s start by taking a deeper look into our newly imported image.
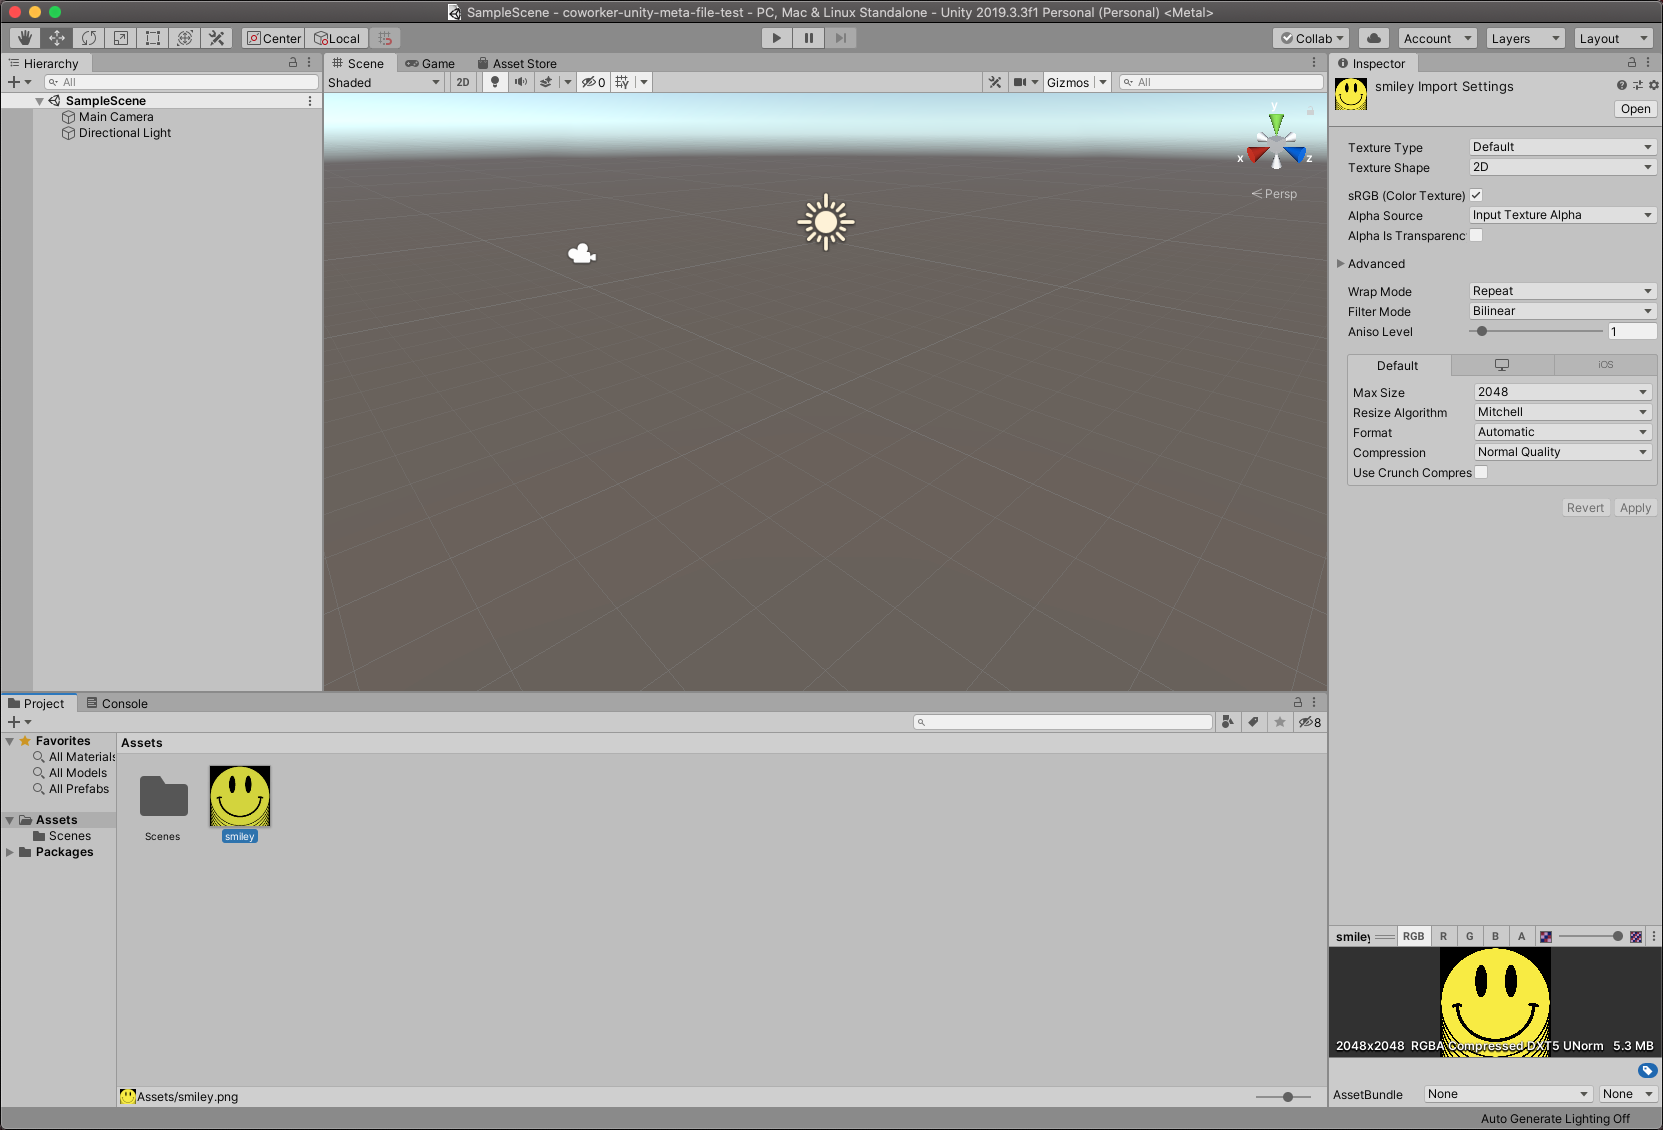
Click on an Asset in the Project → Assets window and you’ll see a bunch of details appear in the Inspector pane on the right of the Unity window.
Meta files contain settings for the Asset
The first thing to notice is the title next to the icon at the top of the Inspector window. You’ll see it read “smiley Import Settings”
These settings tell Unity how to import your image for use in your project. For instance, the Alpha Source setting tells Unity how to determine which pixels in the picture are transparent.
While the import settings aren’t part of the image you have just imported, they are critical for controlling how that image will appear in your project.
Unity can’t store those settings in the image file itself, so it stores them alongside the image in the .meta file.
How are meta files stored?
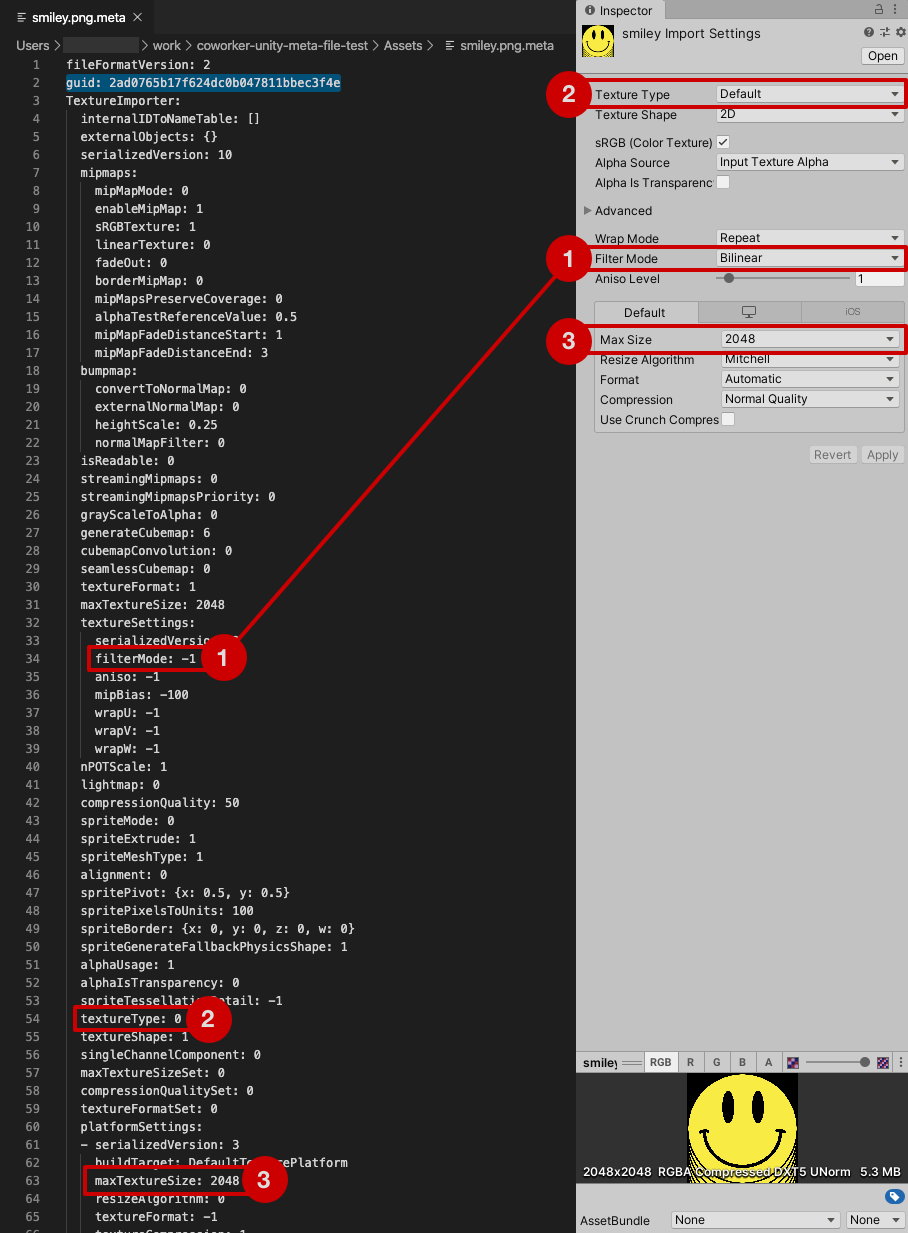
If we take a look inside the meta file with a text editor we’ll see a bunch of lines corresponding to the settings we saw in the Inspector window.
These lines comprise a file format known as YAML Ain’t Markup Language (YAML) A key advantage of YAML is that its a human-readable data serialization format, meaning that it can be read by both humans and computer programs.
The image below shows the how lines in the meta file’s YAML are related to settings in the Inspector window.
Under most circumstances we don’t need to look inside Unity’s .meta files, we can just change settings through the Inspector window and Unity will take care of the rest.
What have we learnt so far?
Now that we understand that Unity meta files contain information that is important to our project, we can answer a couple of the most common questions that people ask about meta files.
Are .meta files just used for version control?
Should I check Unity meta files into source control?
For answers to more frequently asked questions about Unity meta files, head over to the FAQ
Adding an Asset to version control
Add Asset files as a pair
The key thing to remember when adding Assets to version is that files should always be added as a pair:
- The file containing the Asset itself (
smiley.png) - The meta file with the GUID and settings (
smiley.png.meta)
This same rule also applies to changes that alter the filename or location of the Asset:
- Renames:
Assets/smiley→Assets/Happy - Moves:
Assets/smiley→Assets/Textures/smiley - Deletes:
Assets/smiley→ 🗑
For all of these operations, you should commit both files associated with the Asset.
Committing the new Asset
Now that we know to add files in pairs, let’s go ahead and commit our image and its meta file to version control:
- Stage both files for commit
git add Assets/smiley.png Assets/smiley.png.meta
- Commit the change with a descriptive message
git commit -m "Add smiley image and meta file"
- Push the commit to the remote repository
git push
Finally, confirm that we don’t have any more local changes that haven’t been pushed with git status
➜  coworker-unity-meta-file-test git:(master) git status
On branch master
Your branch is up to date with 'origin/master'.

nothing to commit, working tree clean
➜  coworker-unity-meta-file-test git:(master)
Changing an Asset
Next we’ll make a change to the settings for our image and see how that affects the files in our project.
Changes to settings in the Inspector
Let’s change the Filter Mode from Bilinear to Point for that retro-minecraft-look. Click Apply at the bottom of the Inspector window to save the change.
If we look at the changes in git we can see that smiley.png.meta has changed but smiley.png has remained the same.
➜  coworker-unity-meta-file-test git:(master) git status
On branch master
Your branch is up to date with 'origin/master'.

Changes not staged for commit:
  (use "git add <file>..." to update what will be committed)
  (use "git restore <file>..." to discard changes in working directory)
	modified:   Assets/smiley.png.meta

no changes added to commit (use "git add" and/or "git commit -a")
➜  coworker-unity-meta-file-test git:(master) ✗
This is what we would expect because the meta file is where Unity keeps the import settings that we just changed. We haven’t changed the PNG file containing the pixels of the image so we wouldn’t expect a change there.
What exactly did the Unity change in our meta file?
We can look at exactly what Unity changed in the meta file with git diff. This shows us the differences between the file at the head of the repository and our local working copy.
Tip When reading the output from git diff, bear in mind that:
- Lines starting “-“ have been removed in our local working copy.
- Lines starting “+” have been added in our local working copy.
diff --git a/Assets/smiley.png.meta b/Assets/smiley.png.meta
index be751c1..cc8e3f4 100644
--- a/Assets/smiley.png.meta
+++ b/Assets/smiley.png.meta
@@ -31,7 +31,7 @@ TextureImporter:
   maxTextureSize: 2048
   textureSettings:
     serializedVersion: 2
-    filterMode: -1
+    filterMode: 0
     aniso: -1
     mipBias: -100
     wrapU: -1
@@ -57,7 +57,43 @@ TextureImporter:
   maxTextureSizeSet: 0
   compressionQualitySet: 0
   textureFormatSet: 0
-  platformSettings: []
+  platformSettings:
+  - serializedVersion: 3
+    buildTarget: DefaultTexturePlatform
+    maxTextureSize: 2048
+    resizeAlgorithm: 0
+    textureFormat: -1
+    textureCompression: 1
We can see that along Unity has changed the value of filterMode from -1 to 0 as consequence of our change in the Inspector window.
Meta files belong the Unity Editor
You will also see that Unity has changed a bunch of seemingly unrelated things further down in the meta file.
These are a consequence of how Unity chooses to store settings in meta files.
While it might seem a bit redundant that and mysterious, there’s nothing we can do about it and it’s a good reminder that meta files are intended for Unity’s own use and we shouldn’t need to look inside them under normal circumstances.
Changing an Asset that is already under version control
Now that we’ve changed the point filtering setting on our texture, let’s commit the change so that our team mates can enjoy that retro look!
Modified files can go solo
The rules for committing changes to Assets that are already in version control are looser than for those being added for the first time.
Key point
If you have only modified settings in the Inspector, then you only need to commit the .meta file.
If you have only changed the Asset contents, (ie. the pixels in a PNG) the .meta be changed so there is no need to commit it.
The sequence of git commands for changes is pretty much the same as for adding files:
- Stage the meta file for commit since the PNG file hasn’t changed
git add Assets/smiley.png.meta
- Commit the change with a descriptive message
git commit -m "Point filter the smiley texture"
- Push the commit to the remote repository
git push
Moving and renaming Assets
Now that we understand that meta files contain valuable information about our Asset, we can see why it is important that they don’t get separated from their associated Asset file.
Happily, when we change assets in the Unity editor it automatically takes care of keeping their associated meta files up to date with our changes.
To reduce visual clutter and simplify the user experience, Unity doesn’t show meta files in the Editor. It just quietly maintains them in the background.
Moving an Asset in the Editor
To see how this works, let’s move our image using the Unity editor.
Create a new empty folder in the Assets folder say Assets/Textures/. Then in Unity’s Project window, drag the smiley Asset onto the new folder in order to move it.
How Asset moves appear to a version control system
Let’s see what happened behind the scenes. Initially git sees the move as a separate delete of the file in its old location, followed by a create in the new location.
➜  coworker-unity-meta-file-test git:(master) ✗ git status
On branch master
Your branch is up to date with 'origin/master'.

Changes not staged for commit:
  (use "git add/rm <file>..." to update what will be committed)
  (use "git restore <file>..." to discard changes in working directory)
	deleted:    Assets/smiley.png
	deleted:    Assets/smiley.png.meta

Untracked files:
  (use "git add <file>..." to include in what will be committed)
	Assets/Textures.meta
	Assets/Textures/

no changes added to commit (use "git add" and/or "git commit -a")
➜  coworker-unity-meta-file-test git:(master) ✗
But once we add the new directory with git add Assets/Textures, git correctly recognizes the change as a rename.
➜  coworker-unity-meta-file-test git:(master) ✗ git status
On branch master
Your branch is up to date with 'origin/master'.

Changes to be committed:
  (use "git restore --staged <file>..." to unstage)
	new file:   Assets/Textures.meta
	renamed:    Assets/smiley.png -> Assets/Textures/smiley.png
	renamed:    Assets/smiley.png.meta -> Assets/Textures/smiley.png.meta

➜  coworker-unity-meta-file-test git:(master) ✗
It’s also worth noticing that git is correctly identifying our changes as renames as we haven’t the contents of the files, just their locations on disk. This is what we should expect, renaming or moving a file shouldn’t change its contents.
Unity keeps Assets paired with their meta files, so should you
Here we can see that Unity has taken care of moving both smiley.png and smiley.png.meta to the Textures directory.
We can also see that it has created a meta file for our new Assets/Textures/ directory. We’ll come back to meta files for directories later but for now, let’s commit our changes and push them so that our colleagues can use them.
Key Point The important thing to remember here is that we need to commit both of the Asset’s files in order to keep them together.
If we forget one of them, they will become separated in our version control system.
Watch out:When Asset files become separated from their associated meta file, bad things happen.
- References to the Assets become broken. See avoiding broken references for details of how this occurs.
- Import settings get overridden with their defaults, causing unexpected behavior at runtime.
To keep version control correctly up-to-date with Unity’s changes we need to commit both files like this.
➜  coworker-unity-meta-file-test git:(master) ✗ git commit -m "Move smiley to new Textures direcrtory."
[master 15a77d8] Move smiley to new Textures directory.
 3 files changed, 8 insertions(+)
 create mode 100644 Assets/Textures.meta
 rename Assets/{ => Textures}/smiley.png (100%)
 rename Assets/{ => Textures}/smiley.png.meta (100%)
➜  coworker-unity-meta-file-test git:(master) git push
Enumerating objects: 7, done.
Counting objects: 100% (7/7), done.
Delta compression using up to 8 threads
Compressing objects: 100% (5/5), done.
Writing objects: 100% (5/5), 651 bytes | 651.00 KiB/s, done.
Total 5 (delta 1), reused 0 (delta 0)
remote: Resolving deltas: 100% (1/1), completed with 1 local object.
To github.com:unity-at-scale/unity-meta-file-test.git
   d58d4c1..15a77d8  master -> master
➜  coworker-unity-meta-file-test git:(master)
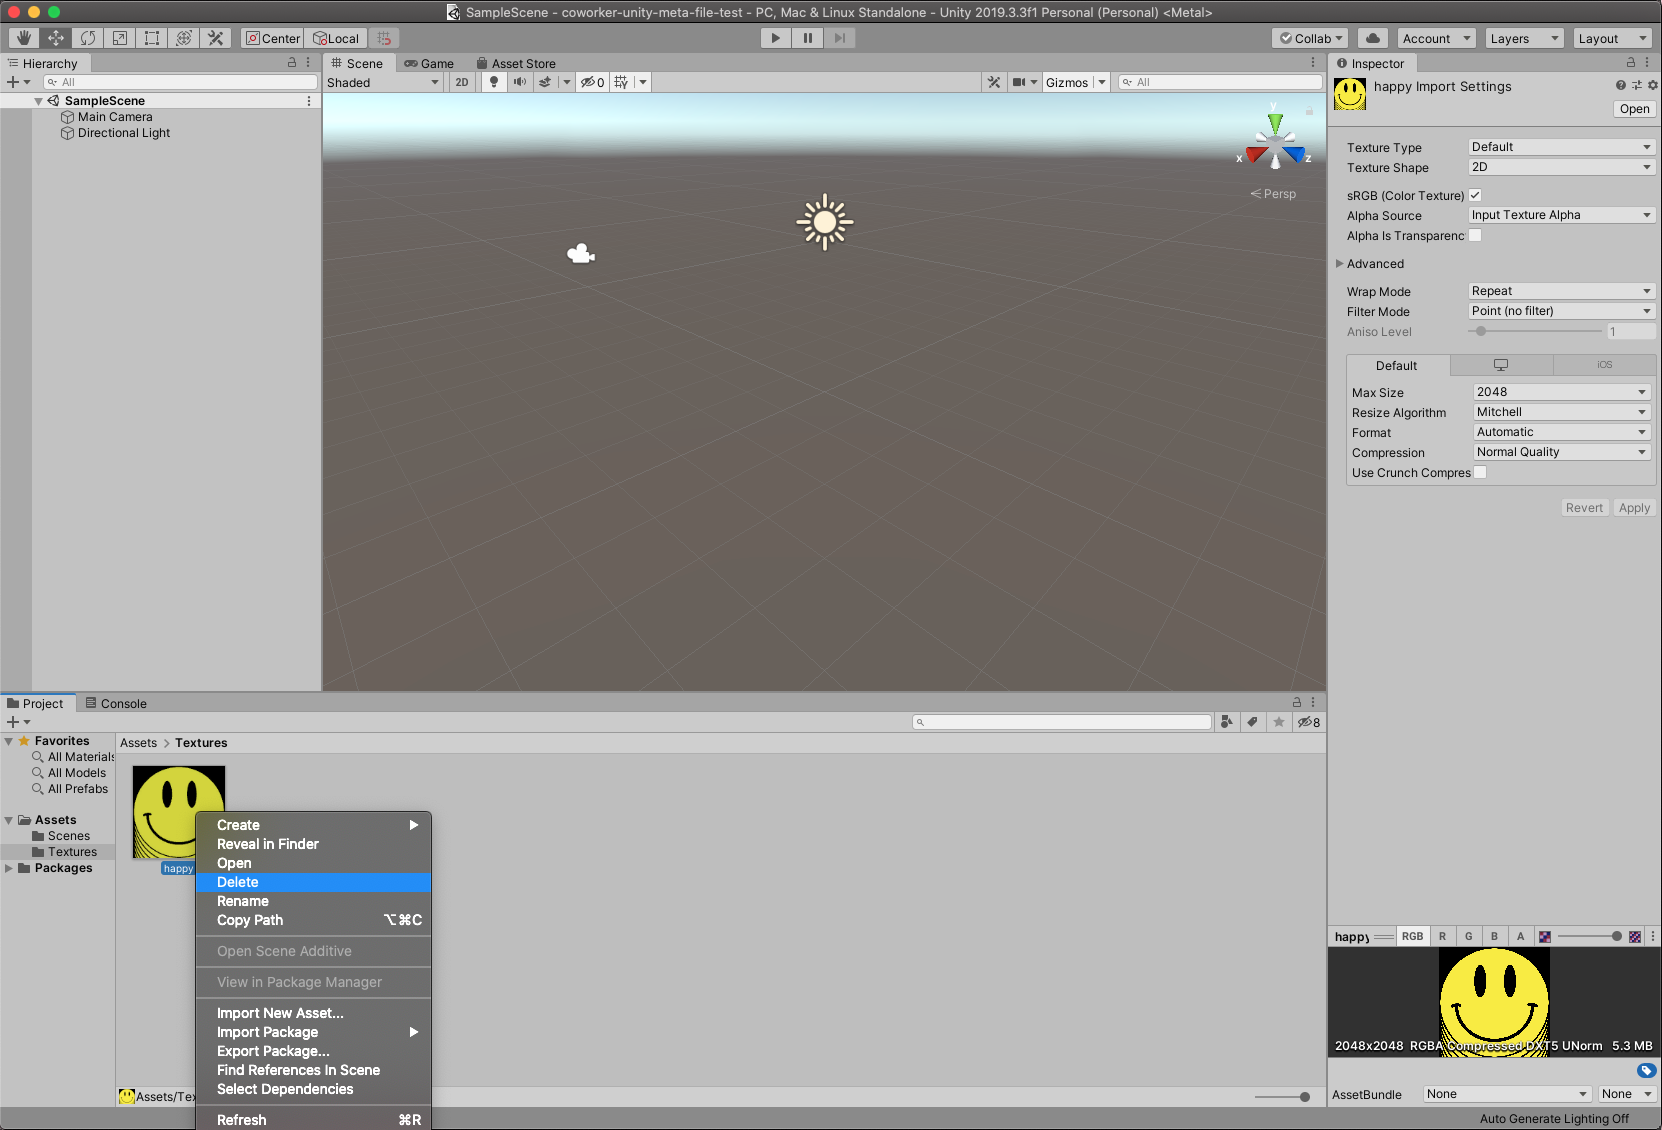
Deleting an Asset
Finally let’s look at what happens when we delete an Asset in the Unity editor by right clicking on it and choosing Delete from the context menu.
And looking at the change from a version control perspective we see the following.
➜  coworker-unity-meta-file-test git:(master) git status
On branch master
Your branch is up to date with 'origin/master'.

Changes not staged for commit:
  (use "git add/rm <file>..." to update what will be committed)
  (use "git restore <file>..." to discard changes in working directory)
	deleted:    Assets/Textures/smiley.png
	deleted:    Assets/Textures/smiley.png.meta

no changes added to commit (use "git add" and/or "git commit -a")
Again, Unity has acted as we would expect, deleting both the Asset smiley.png and its meta file smiley.png.meta.
Commit both files when deleting
As with adds and moves, you should commit both the Asset file and it’s meta when deleting an Asset.
If you forget one of them Unity will step to try and rectify the problem, either deleting resulting Asset-less meta file or creating a new meta file.
When this happens your colleagues will start seeing phantom changes every time they open the project in Unity, which can quite confusing as people try to work out what has happened.
If you multiply that confusion across a team of developers it becomes extremely costly, so it really is worth taking the time to make sure you have committed both of the files.
Summary
In this article we have taken a detailed look at the changes you will see in your version control system after carrying out common operations on an Asset in the Unity Editor.
Along the way we learnt how to commit each of those changes to our version control system in such a way that our assets don’t become broken.
Further reading
You can help your team to commit assets correctly with our checklist for committing assets.
To learn how Unity maintains references between Assets and how those references can become broken, head over to our Avoiding Broken References article.
If you have specific questions about how to deal with a particular situation or error message, our FAQ should have the answer.