How to set up a Unity project in GitHub
In this how-to guide we show you how to set up a Unity project for version control using GitHub.
Pre-requisites
To follow along with this guide you will need the following:
-
Unity
You can download and install different versions of Unity using Unity Hub which is available here. It is worth getting a recent version of Unity because they have better support for version control. We used 2019.3.3f1 to write this guide.
-
Git Client
We’ll be using the command line client in this tutorial. You download it, or alternatively a visual client, here
-
GitHub account
A free account is fine to get started with. You can sign-up here.
Step 1 - Create the project
- Open Unity Hub
- Click the Add button in the top right.
- Choose the version of Unity. (we used 2019.3.3f1)
- Select the path where your new project’s directory will be created.
- Give your project a meaningful name.
- It’s best to avoid spaces and special characters as Unity will create a directory from the project name.
- Click Create to create your project.
Step 2 - Project settings for version control
There are two important settings that your Unity project needs to have before you use it with git:
- Version Control Mode set to Visible Meta Files
- Instructions here.
- Asset Serialization Mode set to Force Text
- Instructions here.
In modern versions of Unity, these settings are the default, but it is worth checking them if your project originated in an older version of Unity.
Step 3 - Initialize the project for git
- Open a Command Line Window (PC) or a Terminal (Mac)
cdinto your new project’s directory- Run
git initto add git conifiguration to your project- This creates a hidden folder
.gitwithin the project directory to hold the files git needs to version control the project
- This creates a hidden folder
- Run
git statusto see how git sees our project. You should see something like this:
➜  unity-meta-file-test git:(master) ✗ git status
On branch master

No commits yet

Untracked files:
  (use "git add <file>..." to include in what will be committed)
	Assets/
	Library/
	Logs/
	Packages/
	ProjectSettings/

nothing added to commit but untracked files present (use "git add" to track)
Step 4 - Take a look inside your new project
We can see that our new project directory contains a bunch of directories that Unity has created for us.
These directories contain files falling in to one of three broad categories:
Source files
These directories contain the files that your project is built from.
Examples of source files are the Scenes, textures, models, source code, etc. stored in the Assets/ directory.
Transient files
These files are created by Unity as you use it to create and build your project.
Typically they don’t contain anything that can’t be created from the source files above. Examples are the asset cache in Library/ and the log files in Logs/
Local settings
These files contain settings that are local to you and your machine.
These files contain things like your personal preferences for window layout and the like. Examples are files in the /UserSettings/ folder.
Step 5 - What to commit? What to ignore?
Key point: This is one of the most common causes of confusion when setting up a Unity project for use with a version control system.
In order to collaborate on your project, your teammates only need a subset of the files from the project directory. Specifically, the Source files in the first category above.
Everything else can either by re-created from the source files or is of no interest to anyone but you. We need to tell Git to ignore these files so that they never get considered for version control.
Adding .gitignore
We do this by adding a file called .gitignore containing details of the files that should be ignored.
Once we have created this file, we’ll add it version control so that our team mates can share it. That way everyone will have the same “clean” view of the project that excludes all of the transient and local setting files.
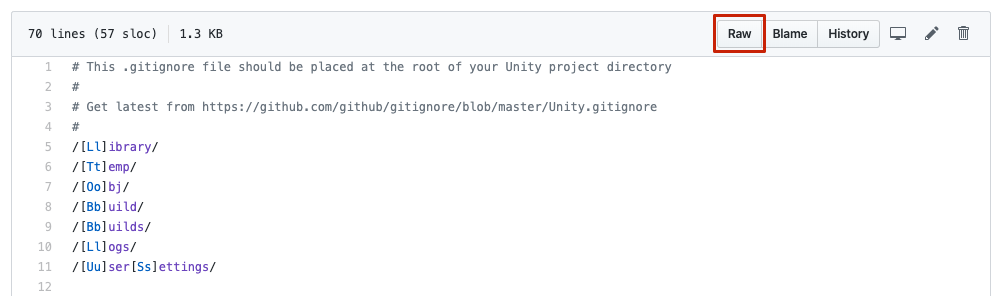
GitHub provide a great template .gitignore file for use with Unity projects here
If you have curl installed you can download the template directly into your project directory like this:
curl https://raw.githubusercontent.com/github/gitignore/master/Unity.gitignore --output .gitignore
Alternatively, create a new file with your text editor, paste in the contents of the template from the above URL and save it as .gitignore in the root of your project directory.
Heads up: Use GitHub’s Raw button to get a view of the file that is suitable for copy and pasting.
Step 6 - Checking our .gitignore
Now, when we run git status again we should see only the files and directories that need to be added to git, with the rest being quietly ignored thanks to our .gitignore file.
➜  unity-meta-file-test git:(master) ✗ git status
On branch master

No commits yet

Untracked files:
  (use "git add <file>..." to include in what will be committed)
	.gitignore
	Assets/
	Packages/
	ProjectSettings/

nothing added to commit but untracked files present (use "git add" to track)
The directories containing transient and local setting files (like Library/) have been omitted.
Step 7 - Staging files for commit
The process of saving a set of changes to git is known as a commiting. We’re now ready to commit our project for the first time.
The first thing we have to do is tell git which files we want to commit. This is known as staging the files for commit.
We run the git add . command to stage files for commit. In this case we specify “.” to add everything in the current directory.
Once you have staged the files, run git status to see what has happened.
➜  unity-meta-file-test git:(master) ✗ git status
On branch master

No commits yet

Changes to be committed:
  (use "git rm --cached <file>..." to unstage)
	new file:   .gitignore
	new file:   Assets/Scenes.meta
	new file:   Assets/Scenes/SampleScene.unity
	new file:   Assets/Scenes/SampleScene.unity.meta
	new file:   Packages/manifest.json
	new file:   ProjectSettings/AudioManager.asset
	new file:   ProjectSettings/ClusterInputManager.asset
	new file:   ProjectSettings/DynamicsManager.asset
	new file:   ProjectSettings/EditorBuildSettings.asset
	new file:   ProjectSettings/EditorSettings.asset
	new file:   ProjectSettings/GraphicsSettings.asset
	new file:   ProjectSettings/InputManager.asset
	new file:   ProjectSettings/NavMeshAreas.asset
	new file:   ProjectSettings/Physics2DSettings.asset
	new file:   ProjectSettings/PresetManager.asset
	new file:   ProjectSettings/ProjectSettings.asset
	new file:   ProjectSettings/ProjectVersion.txt
	new file:   ProjectSettings/QualitySettings.asset
	new file:   ProjectSettings/TagManager.asset
	new file:   ProjectSettings/TimeManager.asset
	new file:   ProjectSettings/UnityConnectSettings.asset
	new file:   ProjectSettings/VFXManager.asset
	new file:   ProjectSettings/XRSettings.asset
You’ll see that everything in our source directories have been moved to the Changes to be comitted section at the top of the output.
Step 8 - Committing the staged files
Now we specified which files we will be committing by staging them, let’s go ahead and commit them to Git with:
git commit -m "First commit, empty project and .gitignore"
The -m option lets us add a message describing what we have committed.
It is a good idea to use meaningful commit messages as they will help you understand the history of your project and diagnose problems in the future.
Pro tip! Commit messages don’t need to be too wordy. For instance, you don’t need to repeat all of the files that you have changed as git takes care of that.
Conversely, they should contain enough information to allow you and your teammates to understand what each commit contains.
Lazy messages like “add stuff” will be really frustrating if you ever have to revisit the commit in the future.
➜  unity-meta-file-test git:(master) ✗ git commit -m "First commit, empty project and .gitignore"
[master (root-commit) abc2f72] First commit, empty project and .gitignore
 23 files changed, 2010 insertions(+)
 create mode 100644 .gitignore
 create mode 100644 Assets/Scenes.meta
 create mode 100644 Assets/Scenes/SampleScene.unity
 create mode 100644 Assets/Scenes/SampleScene.unity.meta
 create mode 100644 Packages/manifest.json
 create mode 100644 ProjectSettings/AudioManager.asset
 create mode 100644 ProjectSettings/ClusterInputManager.asset
 create mode 100644 ProjectSettings/DynamicsManager.asset
 create mode 100644 ProjectSettings/EditorBuildSettings.asset
 create mode 100644 ProjectSettings/EditorSettings.asset
 create mode 100644 ProjectSettings/GraphicsSettings.asset
 create mode 100644 ProjectSettings/InputManager.asset
 create mode 100644 ProjectSettings/NavMeshAreas.asset
 create mode 100644 ProjectSettings/Physics2DSettings.asset
 create mode 100644 ProjectSettings/PresetManager.asset
 create mode 100644 ProjectSettings/ProjectSettings.asset
 create mode 100644 ProjectSettings/ProjectVersion.txt
 create mode 100644 ProjectSettings/QualitySettings.asset
 create mode 100644 ProjectSettings/TagManager.asset
 create mode 100644 ProjectSettings/TimeManager.asset
 create mode 100644 ProjectSettings/UnityConnectSettings.asset
 create mode 100644 ProjectSettings/VFXManager.asset
 create mode 100644 ProjectSettings/XRSettings.asset
Step 9 - Inspecting our first commit
Now that we have committed our files, let’s run git status again to see where we are at.
➜  unity-meta-file-test git:(master) git status
On branch master
nothing to commit, working tree clean
Where did all our changed files go? They have been committed to our local git repository.
But if you do a directory listing we’ll see that the files are still there in our project directory.
 ➜  unity-meta-file-test git:(master) ls
Assets          Library         Logs            Packages        ProjectSettings
The key thing to learn here is that git status only shows the files that are different from our git repository.
Now that our changes have been committed, the repository has the same contents as our project directory. Because they match, there are no changes for git to show us.
Commit history
Git keeps a log of all changes that we ever committed to the repository. That’s every change, to every file along with the commit message.
This log gives a complete history of how our project evolved over time. Let’s take a look at it with git log --name-only
commit abc2f723844a4d095335899fc1c40cb7fae14180 (HEAD -> master)
Author: UnityAtScale <57212682+unity-at-scale@users.noreply.github.com>
Date:   Thu Feb 27 09:19:45 2020 +0000

    First commit, empty project and .gitignore

.gitignore
Assets/Scenes.meta
Assets/Scenes/SampleScene.unity
Assets/Scenes/SampleScene.unity.meta
Packages/manifest.json
ProjectSettings/AudioManager.asset
ProjectSettings/ClusterInputManager.asset
ProjectSettings/DynamicsManager.asset
ProjectSettings/EditorBuildSettings.asset
ProjectSettings/EditorSettings.asset
ProjectSettings/GraphicsSettings.asset
ProjectSettings/InputManager.asset
ProjectSettings/NavMeshAreas.asset
ProjectSettings/Physics2DSettings.asset
ProjectSettings/PresetManager.asset
ProjectSettings/ProjectSettings.asset
ProjectSettings/ProjectVersion.txt
ProjectSettings/QualitySettings.asset
ProjectSettings/TagManager.asset
There’s our commit, along with it’s description and the files we committed.
Later, when we push the repository to GitHub, we will be able use GitHub’s web user interface to browse through our commit history in a much friendlier way.
Commit hash, our commit’s unique identifier
The long hexadecimal number above starting abc2f... is the hash for the commit.
This number uniquely identifies the commit. This is useful when we want to refer to the commit in future, for instance if we want to undo it, remind ourselves of what files it changed or send it to colleague for review.
Step 10 - Sharing our work via GitHub
Now that we have our project in a local git repository, it is time to share it with the team. So far we have been working entirely locally. None of our work has left our machine.
To share our work with the team we need push the changes that we have committed to our local git repository to a server or service where our team mates can get hold of them.
Shared repositories like this are known as remote repositories and sending changes from our local repository to the remote repository is known as pushing.
The GitHub service allows us to create remote repositories that are stored in the cloud where they can be accessed by our team mates.
While we are using GitHub here, there are plenty of other git services available, each with their own strengths and weakness. Some you might want to take a look at are GitLab, BitBucket and Microsoft Azure Repos.
Sign-up to GitHub
The first thing you will need is a GitHub account. GitHub offers a variety of plans, ranging both free and paid.
At the time of writing the free plan is a good place to get started for the purposes of this guide, but you should keep your eye on the paid plans if you are planning to use the repository on a larger project.
The paid plans give you the ability to collaborate with a bigger team. They also give you additional storage space if your project includes a lot of large assets.
Sign up to GitHub here.
Step 11 - Create a repository in GitHub
Once you are signed up to GitHub, we need to create an empty repository to push our local changes to.
GitHub provide a great set of instructions creating a new repository here
Attention Watch out for the visibility setting when creating your new repository.
GitHub’s default for free accounts is to make the repository publicly visible which means anyone on the internet can access it.
If this isn’t what you want, choose the Private option so the repository can only be seen by people that you invite.
Step 12 - Setup SSH keys to access GitHub
The git client is capable of using a variety of different protocols when connecting to a remote repository like the one we just setup in GitHub.
Which one you use is up to you, but we have had good results with SSH as it offers a decent balance between simplicity, security and flexibility.
GitHub show you how to setup SSH access to your GitHub repositories here. The key thing to note down is the repository URL at end of the creation process.
It should look something like this:
git@github.com:<YOUR_GITHUB_USERNAME/YOUR_GITHUB_REPO>.git
Step 13 - Connect your local repository to GitHub
Once you have SSH access to GitHub configured, you need tell your local repository about the remote repository. By doing this, you are letting git know where to look when you push or pull changes from the local repo to the remote one.
Go back to your command line session and after checking that you cd‘d into your project directory, run this command to configure the remote repository, substituting the URL for your own repository.
git remote add origin <GITHUB_REPOSITORY_URL>
In our case it looked like this:
git remote add origin git@github.com:unity-at-scale/unity-meta-file-test.git
Step 14 - Push your local changes to GitHub
Now that we have the local repository connected to the remote one, let’s try to push our local commits to GitHub with:
git push

➜  unity-meta-file-test git:(master) git push
fatal: The current branch master has no upstream branch.
To push the current branch and set the remote as upstream, use

    git push --set-upstream origin master
Unfortunately we are seeing an error here rather than a successful push.
Git is telling us that while it knows where to find the remote repository it doesn’t know which branch in that repository corresponds to the “master” branch in our local repository.
Git helpfully tells us how to configure the remote branch in the error message.
For simplicity it is a good idea to follow git’s default behavior and use consistent names for your local and remote branches. For example, the branch “master” in your local repository will push to the branch “master” in your remote repository.
Let’s accept Git’s suggested configuration:
git push --set-upstream origin master
Now if we go back to the project in GitHub, we’ll see the files from our first commit like this:
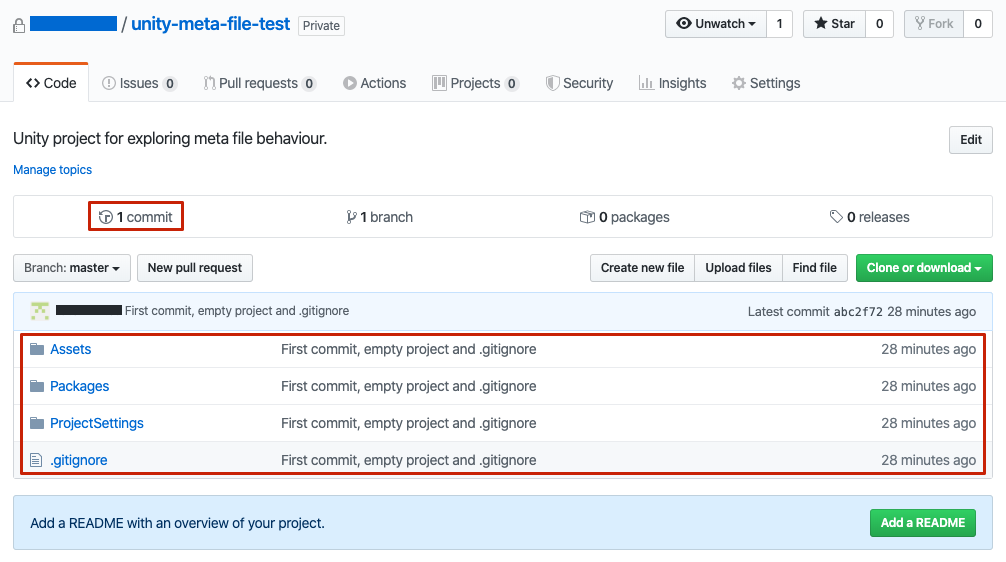
We will also see that we have a single commit, showing:
- The commit message.
- The files that were changed in the commit.
- The commit hash.
Pro tip Notice how Github doesn’t show diffs for .meta files by default.
This is because Unity is supposed to manage them us and we shouldn’t need to look into them.
This is the case most of the time but occasionally you may need to look inside them as we’ll see in our deep dive into meta files.
Step 15 - Cloning a clean copy from GitHub
Before you start inviting your team mates to the project repository in GitHub, let’s verify that it is complete and ready for use.
To do that we will pull down a clean copy of the repository from GitHub in to a new directory on our machine. Git calls the process of pulling a repository for the first time cloning the repository.
Doing a fresh clone mimics the experience that our team mates will have when they first start using the repository from GitHub.
First, leave the directory your original project directory:
cd ..
Then, clone a copy into a new directory like this, where DESTINATION_DIRECTORY is the name of a new directory that git will clone into.
➜  work git clone <DESTINATION_DIRECTORY>
Cloning into 'coworker-unity-meta-file-test'...
remote: Enumerating objects: 29, done.
remote: Counting objects: 100% (29/29), done.
remote: Compressing objects: 100% (28/28), done.
remote: Total 29 (delta 0), reused 29 (delta 0), pack-reused 0
Receiving objects: 100% (29/29), 15.75 KiB | 7.87 MiB/s, done.
➜  work
I used coworker-unity-meta-file-test so my fresh clone will end up a directory with that name.
Note Normally, your team mates would omit the second argument and git would clone into a directory named after the repository.
Step 16 - Test our fresh clone
Now cd into the directory containing our new clone and verify that everything is there:
➜  coworker-unity-meta-file-test git:(master) git status
On branch master
Your branch is up to date with 'origin/master'.

nothing to commit, working tree clean
➜  coworker-unity-meta-file-test git:(master) ls
Assets          Packages        ProjectSettings
➜  coworker-unity-meta-file-test git:(master)
We can see the three principle directories Assets/, Packages/ and ProjectSettings/ which looks positive.
Step 18 - Open the project in Unity
Now let’s load up our new copy into Unity and make sure that everything works.
Go to Unity Hub, add the fresh clone directory and open it.
Note: You will probably see Unity take a while “importing assets” while it repopulates its local caches from the source files in the project.
This will recreate the Library/ directory in your project, but you won’t see that as a change because we excluded it from version control above using the .gitignore.
You only tend to see see this delay when you first open a fresh clone of the project. Unity will then work from your local caches, making subsequent opens much quicker.
Once Unity has opened the project, hit Play and verify that everything behaves as expected.
If it doesn’t, fix up any missing files or errors and then stage and commit your changes to source control as described below.
Step 19 - Committing changes
Now that your project is setup in GitHub, you can get on with developing, making changes to your project and committing them to git as you go.
Each time you have a set of changes ready to share with your team, you’ll be going through the following process to stage and commit them in git:
- Stage the changes to commit -
git add <FILES TO ADD> - Check that the changes are valid and complete, with no missing meta files, duplicate GUIDs etc.
- Commit the change -
git commit -m "<YOUR MESSAGE>" - Push the changes to GitHub -
git push
Pro tip! It is good practice to use a strategy of “little and often” when committing, with each commit containing a cohesive set of changes that can be easily described in the commit message.
For instance, a commit of 10 files with the description “Add loading screen” is easy for you and your colleagues to comprehend. When someone sees it the git history or is asked to review it, they can be pretty sure what those changes are supposed to achieve in your game.
As a counter example, a commit of 150 files with the description “Add loading screen, reorder high score table and add end of level ceremony” is much more difficult for people to make sense of. If we find that the commit introduced a defect, we have a large set of changes to pick through in order to diagnose it.
Keep your commits small, with meaningful descriptions.
Step 20 - Move quickly by avoiding mistakes
The checking stage is where the majority of source control related issues arise with Unity. If someone forgets assets or meta files, they will break the project for the rest of the team.
Breakages like this can be frustrating and costly, particularly if your team is pushing hard to deliver a milestone.
We give strategies for handling breakages like these in our article, Forgotten meta file? Stop the Line!, but a better approach is to invest a little bit of effort to stop breakages reaching the team in the first place. By doing this, you’ll go quicker in the long run.
The key to preventing breakages is catching problems before they get committed, either through automatic tooling or a process that people follow before they commit changes.
If you want to reduce the burden on your team, automation is the way to go and our MetaBuddy plugin for Unity is a good place to start. It finds missing files automatically and advises on how they can be fixed, helping your team become more confident with every commit.
The Unity Asset commit checklist gives you a template for a manual, process based approach. Can’t decide whether to use a checklist or a tool? Learn from our experiences with both.